Thursday, May 23, 2013

John Marshall Workshop


This is a stencil that John made of his good friend holding a duck.  When I first picked up this stencil, I did not see the duck.  He showed me the outline of the duck and how to accentuate areas of the stencil using the indigo pigment.  You can barely see it, but there is a touch of green in his jeans.

 The Ibis stencil is lighter in color.  I dipped it in the light indigo vat.  There is a touch of blue in the winged figure on the top left.
 The Rooster stencil was very intricate.  There is a double row of dots all around the framing.  I used the red pigment on the roosters crown and feet.
 The plantation worker is dressed  very much like my grandmother Sato.  She worked on a sugar and pineapple plantation in Hawaii for 25 years and raised 10 kids.  Her features are not quite my grandmas, but the clothes and hat really captures the image.  There is a touch of brown pigment in the staff.
Daruma is such a strong character.  The fabric this is printed on is a loosely woven linen.  The indigo blue is very lovely.  For some reason, I think this stencil came out the best.  No color pigments were applied.

I really enjoyed John Marshalls indigo workshop. I hope to write more about the indigo vats, the rice bran resist and the soymilk wash.  For now, I'll just enjoy the images.

Looks like suede

 Looks like suede is completed.  This is a log cabin quilt.  I don't know if the pattern has a name, but I just placed it 4 patches with all the lights in the middle and alternated it with 4 patches with all the darks in the middle.  Originally, the quilt was going to be a third of the size.  It all started when Betsy showed us her Amish inspired quilt that she made using Cherrywood fabric.  I loved the way the fabric looked like suede and asked where she got it.  She found it at PIQF and bought a grab bag of 7x9 inch fabric pieces.
 At the PIQF last year, I bought 1 grab bag and 1 cherry roll from Cherrywood fabrics.  To make the most of these 2 selections, I cut the 2 and 1/2 inch strips in half.  So I had a lot of 1 1/4 inch strips.  Then I cut up all the grab bag pieces into 1 1/4 inch strips and laid them all in a box.  The lights and the darks were sorted in the box.  Starting with a 1 1/4 inch square, I pieced the log cabin square.
This is a closeup of the quilting.  I ended up buying 2 more grab bags and 1 more cherry roll to make it into a queen size quilt.  This has a wool batting, a hand dyed backing fabric and a red border.  I used red aurifil 12 wt thread in the quilting.    The red is so intense close up.  But if you step 10 feet away, you don't even see it.  Strange how color tricks your eyes.  I had to use only what was in the box of cut up strips.  This forced me to compromise on the lights and darks.  Since a lot of the color is in the mid range the lights and darks are not as clearly defined as I would have wanted, but somehow it all works out.

Blue Diamonds


 This is a picture of Blue Diamonds.  I have been collecting blue japanese fabrics, indigo fabrics, wax batik fabrics with gradations of blue for a while.  I wanted to highlight these beautiful fabrics in a pattern that will show some movement.  The light diamonds were placed on the left diagonal and the dark diamonds on the right diagonal.  These 2 light and 2 dark pieces were pieced together first.  I then cut diamond shapes out of 5 gradation hand dyed fabrics to be placed from the left, right, top and bottom of each light and dark 4 patch.
 The border fabric is a dark blue indigo fabric that I found at Stone Mountain Daughters fabric store.  It was in a plastic bag with a note to keep it stored in the plastic bag.  Such a beautiful blue.  Even though I washed it, I have the feeling the indigo will still bleed.  After taking John Marshalls workshop this past weekend, I am tempted to soak the whole quilt in soy milk.  Hmmm.
This is a closeup of the border quilting that I did.  I used an Aurifil 12 weight blue.  The stencil was cut out of freezer paper.  I traced the pattern on the freezer paper and using my biggest needle, punched holes using the sewing machine.  Then I pounced white chalk on the blue indigo and was able to sew this repeating pattern all around the border.  I used a 90/14 needle. One of my quilting friends said she thought it was hand quilted.  No.  But what a compliment.  The rest of the quilting was done by stitching in a ditch.

There is a lot of movement in this pattern.  Just what I wanted.

This quilt has been given to my Colleen Sato.


Friday, April 12, 2013

Tubular Pineapple


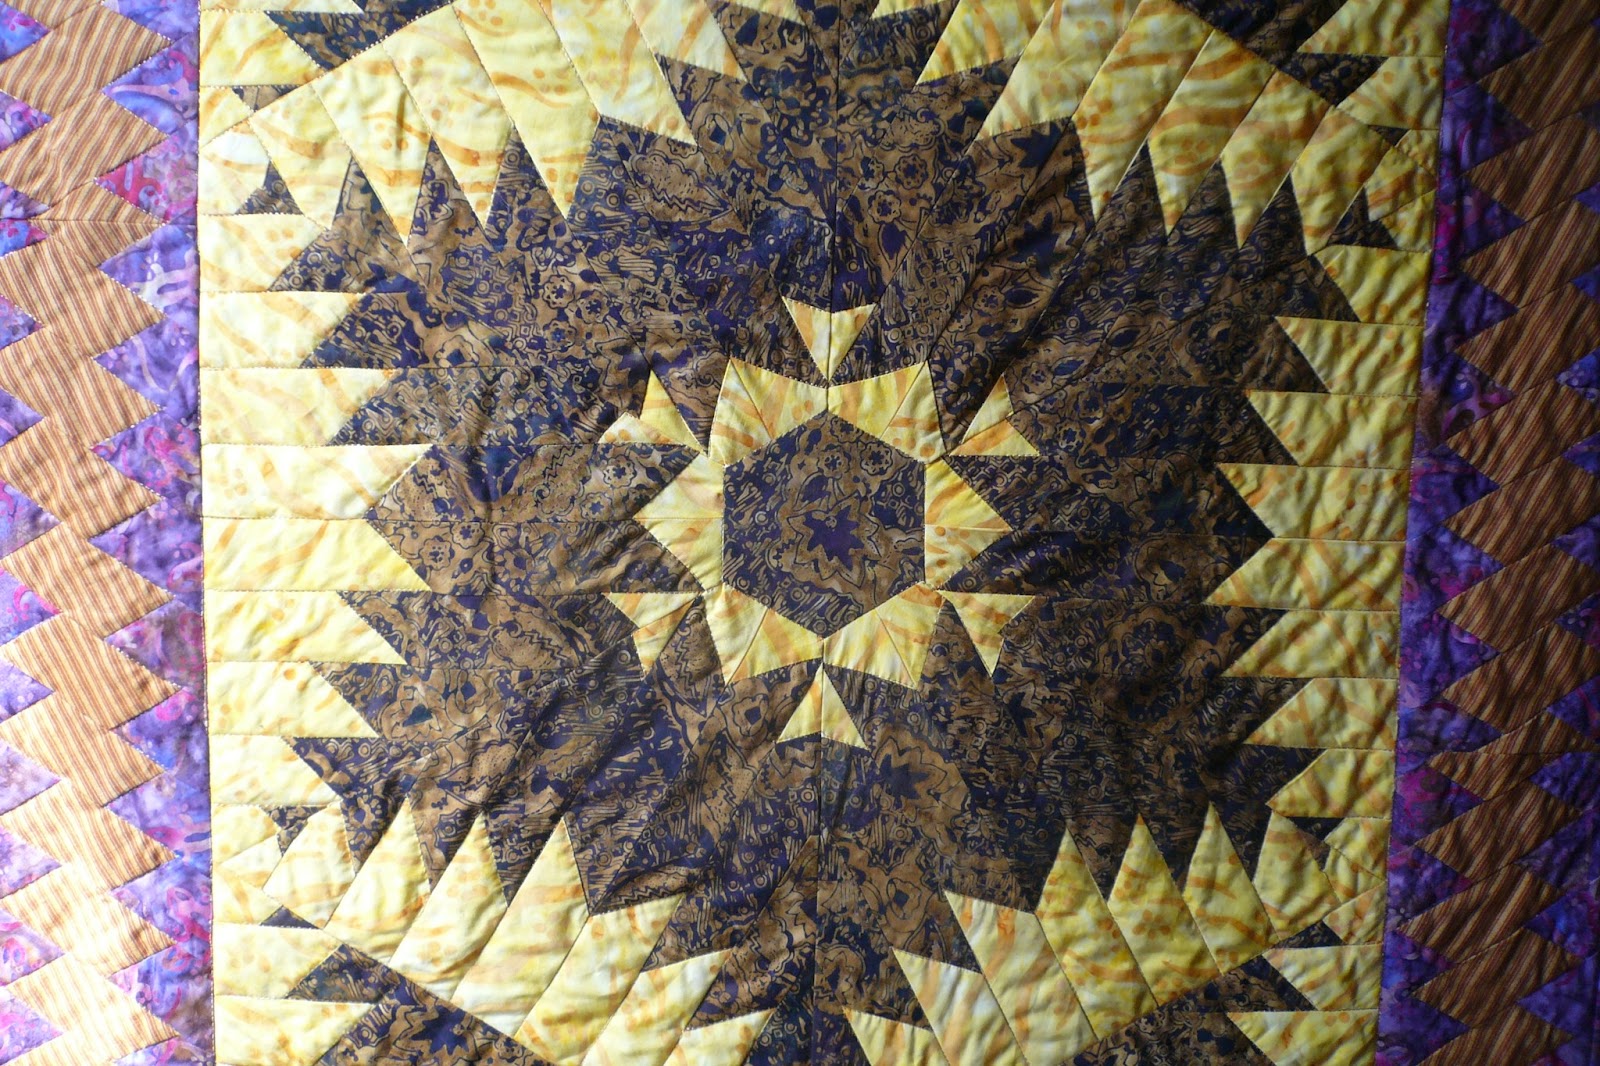
Rita Hutchens taught 2 workshops for our EBHQ guild.  I was fortunate to take the Burst out of the Box workshop on Monday.  Deanna had warned us to be sure to do the homework and she was right.  She had taken the earlier workshop and said one student wasted half of the day getting prepared. We used the full 8 hours of the workshop to learn her technique.  I'm very happy with my final quilt.  Most of the center yellow and brown portion was completed in the 1 day.  She suggested the 60 degree ruler to get the most of the final cut.  Cutting the final long pineapple strip into 8 pieces, I pieced 6 of the pieces into a hexagon.  The last 2 pieces were cut in half to make the 4 corner pieces and completing the center.

 There was a hole in the middle.  I cut out a hexagon from the brown fabric that fit the hole and pieced it in the center.
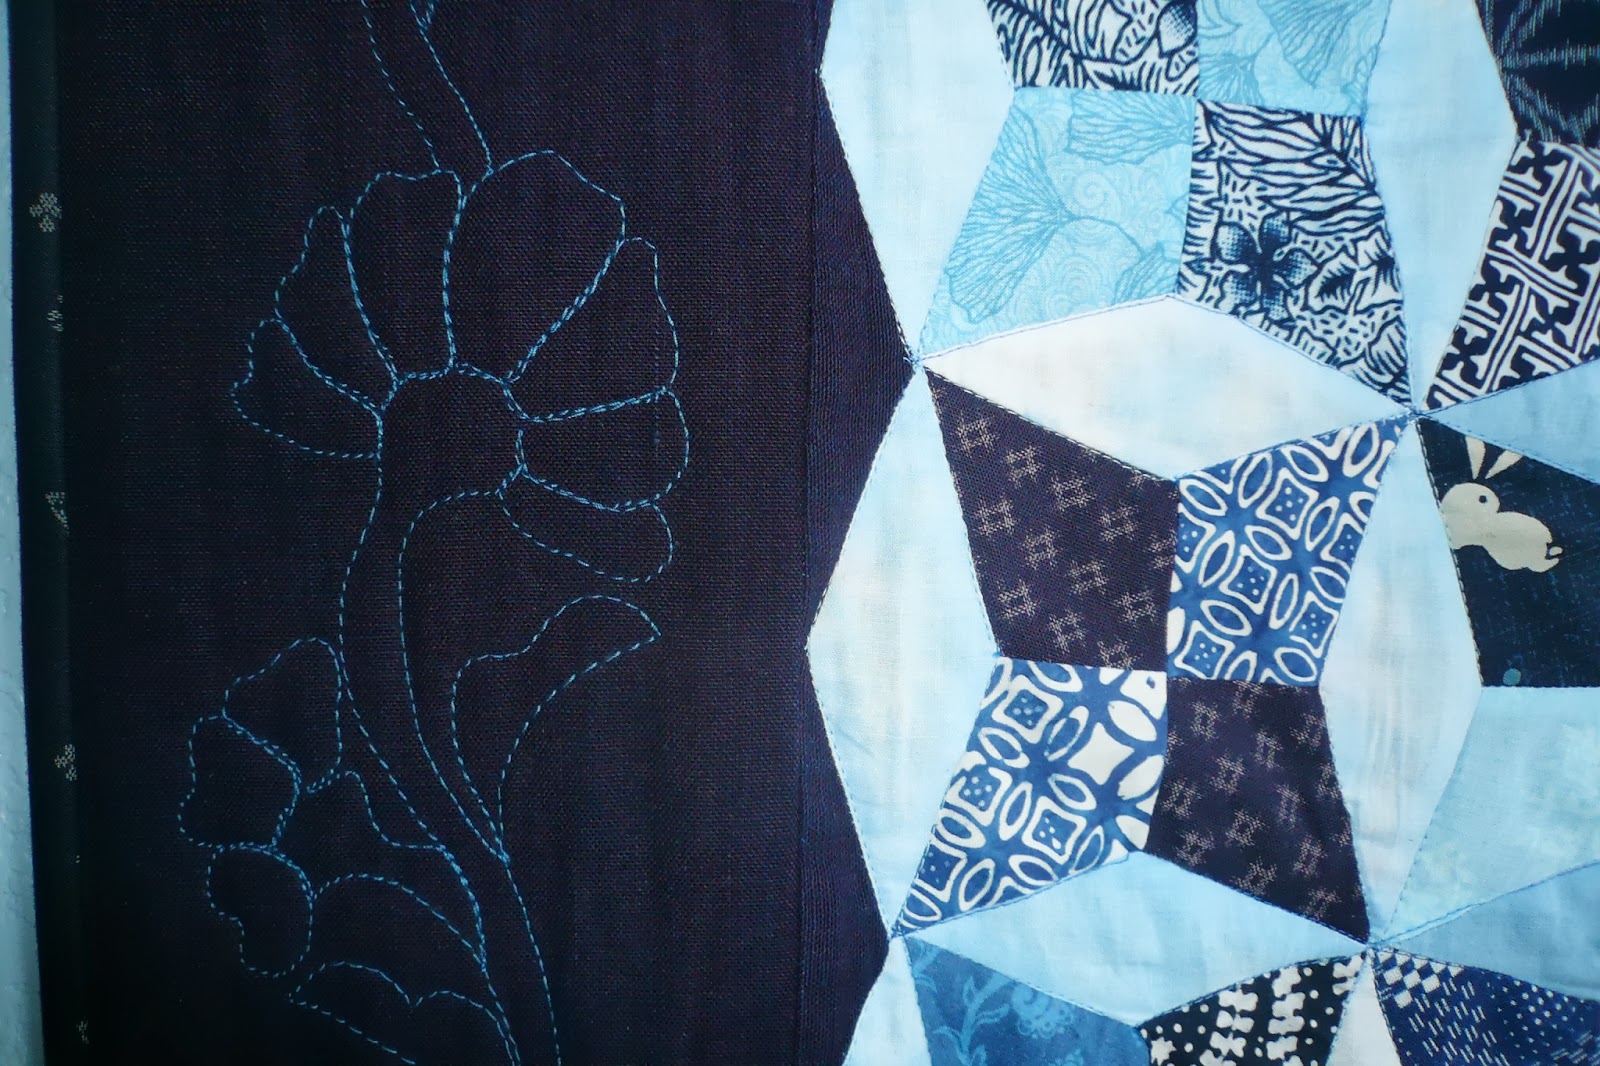
 If you look closely, the points do not match.  Every side of the center hexagon shows the point of the 6 pineapple strips that were cut.
 The border fabrics started out as a tubular pineapple.  but...  without Rita there to point out my mistake, it did not turn out to be a pineapple.  Oh well.  It looks pretty good as a border.
I used gold thread from Superior to stitch in the ditch.  I like the way the thread sparkles.  The pineapple spines have all been stitched.  There is still the middle to quilt, but I haven't figured out how to quilt that.
Thank you Lily for sharing your pictures from the class.  Thank you Suzi for sharing your class notes.  Even though I completed this project, there are still questions.  My brain just doesn't understand the how did she do that?  Magic of course.  One of Ritas favorite saying is "Bias is your friend"  Every time she said that, I would laugh.  Bias has not been my friend.  But using this technique, it does make very complicated patterns from tubular piecing.  Not super easy.  Bias can be my friend, but like any good friend, I'll have to work at it.

Friday, March 15, 2013

tabi

 Have you ever seen a japanese fishermans water shoe?  I bought these about 35 years ago at a hardware store in Waipahu.  I think the name was Arakawas.  They had all kinds of japanese gardening tools and fishing stuffs.  I picked these up thinking that I would use it when I went scuba diving.  I think I only used these once or twice and put them away.
 I have decided to throw these away since I probably will never use them.  The rubber is starting to disintegrate.
I think I was originally fascinated with the fastening.  It is not a button or a zipper or a shoestring.  It is 3 metal tabs that are slotted into the woven slots on the other side.  There are 2 slots which control the size or tightness of the show.  On closer examination, the metal tabs are sewn into the seam.  This must have been a very powerful sewing machine.

lavendar elephants


 Lavendar, yellow and baby elephants.  That was the description, my coworker made describing the baby quilt that she wanted me to make.  What a challenge.  No pink no blue and how do you make an elephant?  I went on the internet and googled baby elephant quilt and I got a free pattern to piece the elephant block.  I picked this pattern, because it was a pieced pattern.  The samples showed how you can add button eyes and  yarn tails and the trunk holding balloons.   Since this is for a baby, I did not add the buttons.
Here is a closeup picture.  I did add a yarn tail for the momma and baby elephants.  The baby elephant is not pieced.  I traced the pattern, cut it out of a lavendar fabric, turned under the seams and topstitched it onto the yellow background.

I cut out the elephant pattern with freezer paper and put them in different places on the quilt.  The quilting is a meander stitch.  Tina was very happy with the quilt.

Wednesday, February 27, 2013

Woven bag

 This is the completed project from Rami Kims Monday workshop.  I made it into an iPad bag with a zipper. I love the three dimensional effect that the woven strips make.  This is not pieced.  It is folded strips of fabric that are woven together, then put on wonder under and fused onto a foundation fabric.
This is a closeup of the three dimensional technique.  She also gave us instructions on a six pointed star pattern, but I was not able to do it by just reading the instructions.  It really does help to have the teacher there to show us our mistakes.  Rami had to stop me twice to start over, because I was weaving it wrong.  Here is a picture of the star bag that Rami made.