Sunday, June 3, 2012

Sashiko thread

I wish I had taken the time to look through this book before I started hand quilting my clamshell sampler.  The book "The Classic Quilting of Sashiko" is an 1998 publication from Quilter's Resource publications.  It looks like a Japanese publication that has been translated to english.  The graphics and projects have a very Japanese feel to them.  Thankfully the centimeters are also translated to inches.


I don't remember how I got this book, but I do remember my Mom giving me her Sashiko thread stash.  She had taken a class in Hawaii and had some wonderful samplers made with mostly the white thread against the traditional indigo fabric.  I guess she was planning to make more colorful samplers with the thread stash that she collected.  I am very fortunate to have these, since they are probably very expensive now.

 As an example, I purchased these 2 small packets of sashiko thread from the "Calico Cat" store in Hawaii for $3.95 each.  These small packets are about one third the size of the upper threads.

 This is the sampler that I worked on with the Sashiko thread.  It is a clamshell pattern using some of my hand dyed fabric and other japanese fabrics.
This is the back of the clamshell sampler which shows the knotted threads.  After I read the book, I realized that I was not supposed to knot the thread, but take 2 or 3 backstitches.

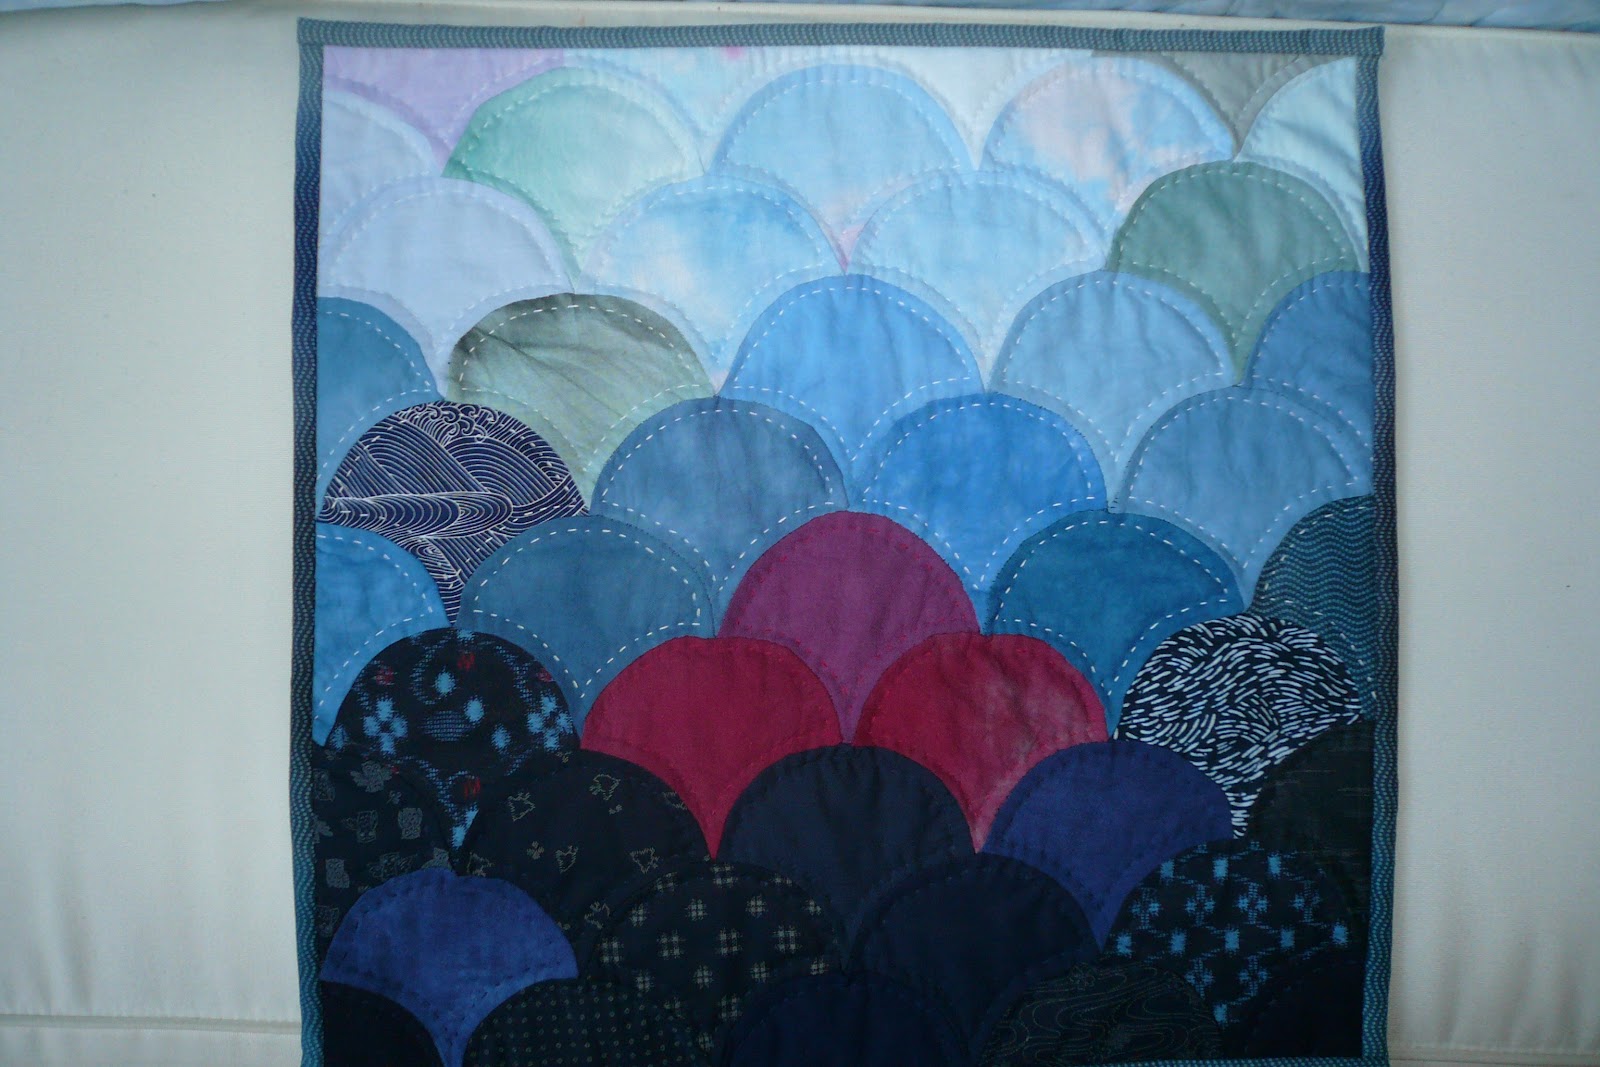
Doing this sampler made me realize the following.  Do your homework.  Learn as much as you can about something. Take the time to read the instructions.  You'll save yourself time and a lot of knotty situations.

Monday, May 28, 2012

Fabric Postcard

I was asked to make a fabric postcard by Cindi for a group present.  She gave us instructions on how to construct it which I read and promptly forgot where I put the directions.  I did remember that it had to be 4 inches by 6 inches and to sew a paper backing to the fabric with satin stitching.  With this in mind, I took scraps from my current project and made a small version.  The Basket Weave pattern that I am working on calls for 2 1/2 inch wide strips.  For the postcard, I decided to use 1 1/2 wide strips.  This is how it came out.  Pretty good.  Postcards make nice small projects and it didn't take much time.

 This is a picture of the project that I am working on now.  It is still not done, but I love the way that it is coming along.
 After hand piecing the patches together.  I finally figured out a way to machine piece the patches.  This is a
picture of the basic unit.


If I have time, I am thinking of writing down the instructions on how to piece this quilt.  It is based on a picture of a beautiful quilt from the 2012 Tokyo quilt show.  Of course, that quilt used tiny tiny 1 inch pieces.


Sunday, May 6, 2012

Marjan Klupfel Monday Workshop


 Marjan brought a lot of patterns and hand dyed fabrics  for her plantasy workshop.  She showed us how to trace the pattern onto the wonder under release paper.  Reminder, the pattern will be reversed when you do this.  All the fabrics that were dyed in the Saturday workshop, I used in the Monday workshop.

 I chose the simplest pattern.  The dragonfly.  I was able to trace and cut out all the pieces on Monday.  I was going to start sewing the pieces down, when I realized I forgot my darning foot.  Oh well.  I finished it today and just have the binding to work on.
 Marjan showed us how to use Angelina fibers and foiling using wonder under.  I made my dragonfly wings with the foil on the bottom and angelina fibers on top.
Another trick she showed us was to fuse two fabrics together and just stich it onto the quilt to make it three dimensional.  This gave the quilt a lot of movement.


Marjan Klupfel Saturday Workshop


Last week Saturday, I helped at a dye workshop held by Marjan (pronounced Marianne) Klupfel.  Her supply list said to bring 5 yards of pfd fabric or pre-washed white and 1 yard of pre-washed black fabric.  I brought 7 yards and wished I had more.

Her system of dying fabric in plastic bags made for a very easy fabric dying with a lot of results.  I made two sets of 6 gradation dying with.

Golden yellow gradation

Brown gradation
These two half yard pieces were either painted on with foam brushes or folded and the dye sprayed on then wrapped in plastic garbage bags overnight.
I used a 4 inch pvc pipe to pole wrap these 3 pieces.  Instead of string pole wrapping, I used about 6 rubber bands and squished it onto the pole.  Then they were dunked in the soda ash solution for a minute.  With a plastic bag protecting the table, I squirted or painted on the dyes.
With my last yard of black fabric, I cut it in half and pole wrapped each one lengthwise and the other width wise using the rubber bands.  I used a foam paintbrush to brush the clorox bleach on the black fabric.  This was Kona Cotton fabric and the brown color just came out.  Others who used Joann Black fabric had a brilliant red color.  The pole was then dipped in a bucket of water, then a bucket of water with sodium thioxide and then a bucket of water.  Beautiful.

Wednesday, May 2, 2012

Wheelchair Bag


This is the wheelchair bag that I made for Doris last year.  In less than a year this bag has been ripped at the handle base, the buttons were replaced 3 times and the small flower buttons are almost all gone.  Everytime she goes through close doorways, the bag would get tugged and pulled on.  The fabric held up, but the buttons and stitching needs to be reinforced.


This is her replacement bag.  It is made from marrimekko fabric with fused hula girl and turtle.  Doris really loved the hula girl and she said the turtle looked so real.  It feels so good to make something that is used every day and looks good.  This is the front of the bag


This is the back of the bag.  The buttons are put on the back so they won't get caught and torn off.  Hopefully this bag will last a little longer.


Sunday, April 8, 2012

Clam Shell


Postal Blue is finished.  The pictures have been selected, printed, cut to size and ironed on the quilt.  I took this picture standing on the stairs looking down.  Do you see my socks?


This is my next project that I am almost finished with.  It is a clamshell pattern. I made a template of the clamshell with some plastic template.  Then I went through my whole fabric stash and cut out a clamshell from almost every fabric that I had.  I sorted all the cut fabrics by color.  Red, pink, blue, tourquoise, dark blue, browns, etc.  I noticed that the colors mostly sorted themselves into packs of 25.  So then I started to hand piece them.  I usually sorted the 25 pieces on the couch next to me in rows of 5 each of 5.  As I watched television in the evening, I was able to piece together one set.  Once I had a lot of sets done, I laid them out on the floor to see how they looked together.  I had to cut out more circles and part circles to complete the sides and bottom edges.  I wanted it to have scallops all around the quilt.  I have finished outline stitching in the ditch to secure everything and take out all the safety pins.   Now, I'm trying to figure out if it needs more quilting.
 I had to move everything around in the room to be able to put this on the wall and take a photo of it.

Here is a close up.  I was thinking of naming this quilt Clamshell Mountains or Shell Mound.


Sunday, April 1, 2012

quilt national 2011

The San Jose Quilt Museum  http://www.sjquiltmuseum.org/ currently has the Quilt National 2011 quilts until April 29, 2011.  If you have the chance, it is worth a visit.  My husband Larry asked me on the drive there "Whats the difference between these quilts and the International Quilt Festival? What a loaded question.  I said that these are contemporary art quilts.  The IQF quilts are more traditional.

Unfortunately we were not able to take photos of the quilts.  So here is a photo of the wonderful book that the Dairy Barn Arts Center published in Athens Ohio.


The exhibit was wonderful.  I was so proud to see the California quilters Ellen Oppenheimer's our own EBHQ member BR #1 and Tanya Browns "Farmer Brown".  I had taken two fabric dying classes from Ellen and was very impressed with her skill and attention to detail.

I think my favorite quilts were the Shibori dyed ones.  Elin Noble's "Fugitive Pieces" and Sue Cavanaughs "Ori'Kume 20" really stood out for me.  I had taken a class with Sue Cavanaugh and the size of her piece is very impressive.  In the workshop, she was able to take us step by step in her technique.  We tried a small 8 inch piece so to see this large quilt was a treat.

Larry liked the quilt "Mother Me, Mother you".  He said you could see it as 3 ladies or an elephant in the room.  What elephant.  What ladies?  I couldn't see what he was seeing.  He said this is what he thinks quilts are.  Using recycled fabric to make something that pleases your eyes and makes you want to keep looking at it to see the details.  Wow.  I have a lot to learn.

Since we couldn't take pictures of the quilt national quilts, here are 2 quilts that were at the entrance from the san jose museum collection.


Hexagon and Stars


This quilt had all the Quilting Guilds in it.  Do you see the EBHQ block in the top right?
How wonderful.